-
[React] Todolist 만들기 정리(3)📌 React 2022. 9. 29. 01:36

Context 를 만들어주었으니, 이제 Context 와 연동을 하여 기능을 구현하자.
TodoHead.js
Context 에 있는 state 를 받아와서 렌더링을 하고, 필요한 상황에는 특정 액션을 dispatch 하면 된다.
TodoHead 에서는 done 값이 false 인 항목들의 개수를 화면에 보여준다.
추가로 날짜가 보여지는 부분을 작업해준다.
import React from 'react';
import styled from 'styled-components';
import { useTodoState } from '../TodoContext';

const TodoHeadBlock = styled.div`
  padding-top: 48px;
  padding-left: 32px;
  padding-right: 32px;
  padding-bottom: 24px;
  border-bottom: 1px solid #e9ecef;
  h1 {
    margin: 0;
    font-size: 36px;
    color: #343a40;
  }
  .day {
    margin-top: 4px;
    color: #868e96;
    font-size: 21px;
  }
  .tasks-left {
    color: #20c997;
    font-size: 18px;
    margin-top: 40px;
    font-weight: bold;
  }
`;

function TodoHead() {
  const todos = useTodoState();
  const undoneTasks = todos.filter(todo => !todo.done);

  const today = new Date();
  const dateString = today.toLocaleDateString('ko-KR', {
    year: 'numeric',
    month: 'long',
    day: 'numeric'
  });
  const dayName = today.toLocaleDateString('ko-KR', { weekday: 'long' });

  return (
    <TodoHeadBlock>
      <h1>{dateString}</h1>
      <div className="day">{dayName}</div>
      <div className="tasks-left">할 일 {undoneTasks.length}개 남음</div>
    </TodoHeadBlock>
  );
}

export default TodoHead;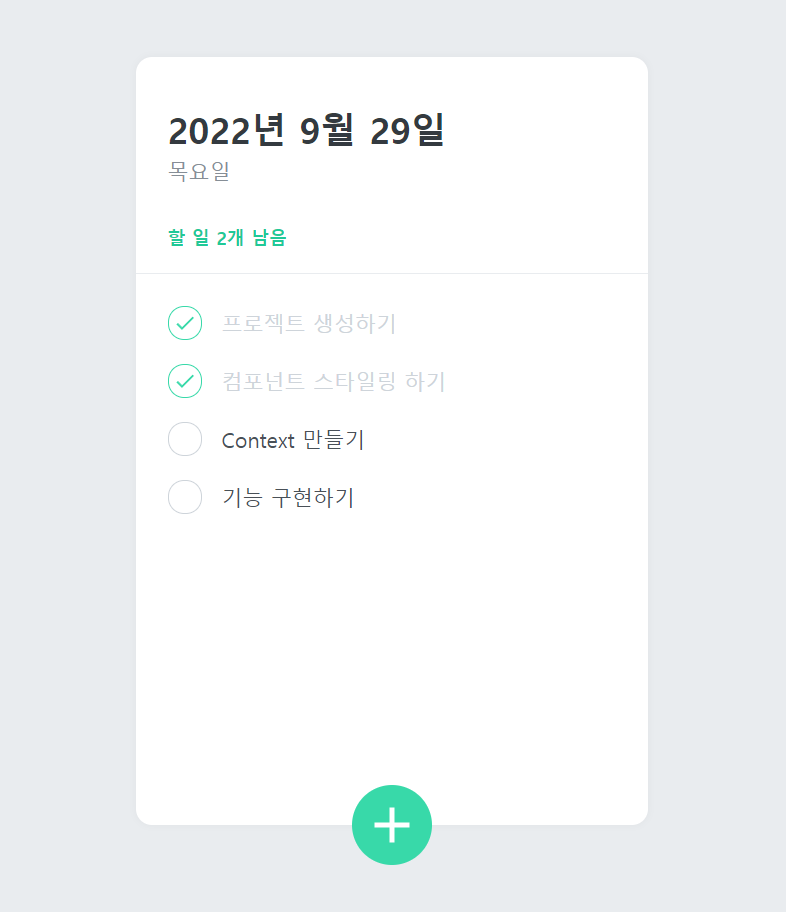
TodoList.js
state 를 조회하고 이를 렌더링해주어야 한다.
그리고, onToggle, onRemove 와 같이 항목에 변화를 주는 작업은 이 컴포넌트에서 신경 쓸 필요 없다.
이 작업은 TodoItem 에서 해줄거다.
import React from 'react';
import styled from 'styled-components';
import TodoItem from './TodoItem';
import { useTodoState } from '../TodoContext';

const TodoListBlock = styled.div`
  flex: 1;
  padding: 20px 32px;
  padding-bottom: 48px;
  overflow-y: auto;
`;

function TodoList() {
  const todos = useTodoState();

  return (
    <TodoListBlock>
      {todos.map(todo => (
        <TodoItem
          key={todo.id}
          id={todo.id}
          text={todo.text}
          done={todo.done}
        />
      ))}
    </TodoListBlock>
  );
}

export default TodoList;
TodoItem.js
dispatch 를 사용해서 토글 기능과 삭제 기능을 구현하자.
import React from 'react';
import styled, { css } from 'styled-components';
import { MdDone, MdDelete } from 'react-icons/md';
import { useTodoDispatch } from '../TodoContext';

const Remove = styled.div`
  display: flex;
  align-items: center;
  justify-content: center;
  color: #dee2e6;
  font-size: 24px;
  cursor: pointer;
  opacity: 0;
  &:hover {
    color: #ff6b6b;
  }
`;

const TodoItemBlock = styled.div`
  display: flex;
  align-items: center;
  padding-top: 12px;
  padding-bottom: 12px;
  &:hover {
    ${Remove} {
      opacity: 1;
    }
  }
`;

const CheckCircle = styled.div`
  width: 32px;
  height: 32px;
  border-radius: 16px;
  border: 1px solid #ced4da;
  font-size: 24px;
  display: flex;
  align-items: center;
  justify-content: center;
  margin-right: 20px;
  cursor: pointer;
  ${props =>
    props.done &&
    css`
      border: 1px solid #38d9a9;
      color: #38d9a9;
    `}
`;

const Text = styled.div`
  flex: 1;
  font-size: 21px;
  color: #495057;
  ${props =>
    props.done &&
    css`
      color: #ced4da;
    `}
`;

function TodoItem({ id, done, text }) {
  const dispatch = useTodoDispatch();
  const onToggle = () => dispatch({ type: 'TOGGLE', id });
  const onRemove = () => dispatch({ type: 'REMOVE', id });
  return (
    <TodoItemBlock>
      <CheckCircle done={done} onClick={onToggle}>
        {done && <MdDone />}
      </CheckCircle>
      <Text done={done}>{text}</Text>
      <Remove onClick={onRemove}>
        <MdDelete />
      </Remove>
    </TodoItemBlock>
  );
}

export default TodoItem;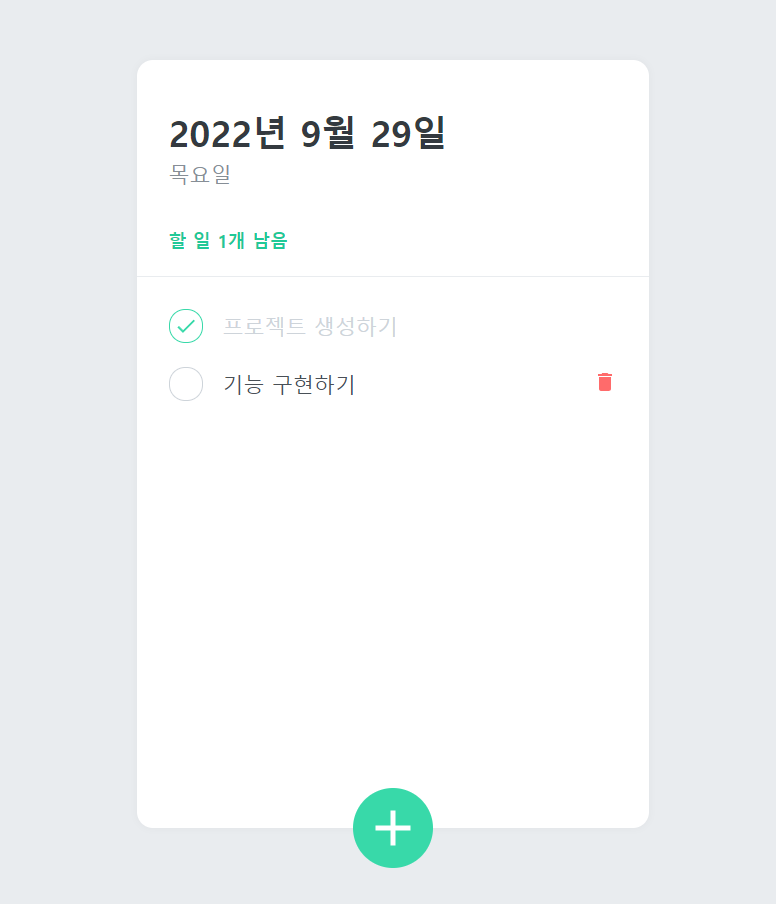
TodoCreate.js
onSubmit 에서는 새로운 항목을 추가하는 액션을 dispatch 한 후, value 초기화 및 open 값을 false 로 전환해준다.
React.memo 를 사용해서 TodoContext 에서 관리하고 있는 state 가 바뀔 때, TodoCreate 의 불필요한 리렌더링을 방지 할 수 있다.
만약 이전에 Context 를 하나만 만들었다면 이런 최적화를 하지 못하게 된다.
import React, { useState } from 'react';
import styled, { css } from 'styled-components';
import { MdAdd } from 'react-icons/md';
import { useTodoDispatch, useTodoNextId } from '../TodoContext';

const CircleButton = styled.button`
  background: #38d9a9;
  &:hover {
    background: #63e6be;
  }
  &:active {
    background: #20c997;
  }

  z-index: 5;
  cursor: pointer;
  width: 80px;
  height: 80px;
  align-items: center;
  justify-content: center;
  font-size: 60px;
  position: absolute;
  left: 50%;
  bottom: 0px;
  transform: translate(-50%, 50%);
  color: white;
  border-radius: 50%;
  border: none;
  outline: none;


  transition: 0.125s all ease-in;
  ${props =>
    props.open &&
    css`
      background: #ff6b6b;
      &:hover {
        background: #ff8787;
      }
      &:active {
        background: #fa5252;
      }
      transform: translate(-50%, 50%) rotate(45deg);
    `}
`;

const InsertFormPositioner = styled.div`
  width: 100%;
  bottom: 0;
  left: 0;
  position: absolute;
`;

const InsertForm = styled.form`
  background: #f8f9fa;
  padding-left: 32px;
  padding-top: 32px;
  padding-right: 32px;
  padding-bottom: 72px;

  border-bottom-left-radius: 16px;
  border-bottom-right-radius: 16px;
  border-top: 1px solid #e9ecef;
`;

const Input = styled.input`
  padding: 12px;
  border-radius: 4px;
  border: 1px solid #dee2e6;
  width: 100%;
  outline: none;
  font-size: 18px;
  box-sizing: border-box;
`;

function TodoCreate() {
  const [open, setOpen] = useState(false);
  const [value, setValue] = useState('');

  const dispatch = useTodoDispatch();
  const nextId = useTodoNextId();

  const onToggle = () => setOpen(!open);
  const onChange = e => setValue(e.target.value);
  const onSubmit = e => {
    e.preventDefault(); // 새로고침 방지
    dispatch({
      type: 'CREATE',
      todo: {
        id: nextId.current,
        text: value,
        done: false
      }
    });
    setValue('');
    setOpen(false);
    nextId.current += 1;
  };

  return (
    <>
      {open && (
        <InsertFormPositioner>
          <InsertForm onSubmit={onSubmit}>
            <Input
              autoFocus
              placeholder="할 일을 입력 후, Enter 를 누르세요"
              onChange={onChange}
              value={value}
            />
          </InsertForm>
        </InsertFormPositioner>
      )}
      <CircleButton onClick={onToggle} open={open}>
        <MdAdd />
      </CircleButton>
    </>
  );
}

export default React.memo(TodoCreate);
여기까지가 투두리스트 만드는 과정이다.🎉
내가 여기서 크게 배웠던 점은 작업의 흐름이다.
이건 프로젝트를 많이 겪다보면 자연스럽게 익혀지거나 더 좋아지지 않을까 싶다.
반응형'📌 React' 카테고리의 다른 글
[Redux] redux createStore 취소선과 해결 방법 (0) 2022.10.18 [React] TypeError [ERR_INVALID_ARG_TYPE]: The "path" argument must be of type string. Received undefined 에러 (0) 2022.10.14 [React] Todolist 만들기 정리(2) (0) 2022.09.28 [React] Todolist 만들기 정리(1) (0) 2022.09.28 [React] Context API (0) 2022.09.27